This particular post is going to be directed to the film-shooting readers. The digital shooters have the chimp-screen and histogram graphs to check on the fly. There are a few tricks for twilight shooting for digital shooters, and will address them in a future post.
One of the most common questions that is asked in workshops and lectures is when is the right time to shoot twilight? It is not as obvious as one might think, as your eye has the remarkable ability to adjust for almost any sort of light, but the camera and film have to told how and when to shoot.
Many years ago, I tested and re-tested, taking copious notes to find that “magic hour” to shoot when the ambient light matches the artificial lights of street lamps, etc. I did my tests with 35mm transparency film, processed it and left it unmounted, to keep the images in order. Shooting 35mm film is still cheap and easy, and I suggest testing the same way today.
You will need a light meter of some kind, preferably a spot meter. I use a Sekonic, but there are several others. Also needed is a watch or similar clock and a notebook and pen or recording device. Years ago, I quickly went to the recording device, in those days a compact cassette recorder, as fumbling with a pen and paper in the dark is not fun. Today, I still take notes for every sheet of film I shoot, but use my smart-phone and a simple recording app. I save the (.wav) files (that can even be emailed) and play them back when the film is processed while I am viewing them on the lightbox. I then write the exposure information on the sleeve.
My examples below are to give you an idea of what the images will look like, as there are many variables such as density of the cloud cover (if any); direction of the view (east or west); time of year; location; film type, etc. Don’t try and shoot by my times, as they are just a constant to give an idea. My watch might be off a minute or two anyway.
For this exercise I shot Kodak E100-VS transparency film, a daylight balanced positive film, in this instance, in 4×5 format. I shot 5 sheets of film, predicting one of the middle exposures would be the best. The location is a well hidden spot on Yerba Buena Island in San Francisco Bay, overlooking the Bay Bridge with the SF skyline beyond. Unfortunately, a light rain began just as I started my exposures. I had to use the darkcloth to protect the camera and the lens from raindrops between exposures.
.
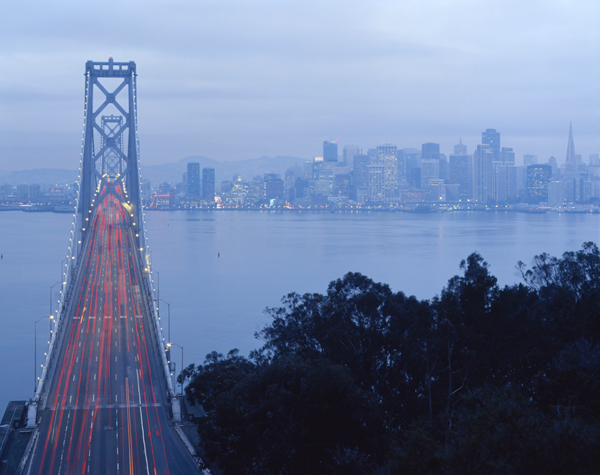 This image was shot a bit early, but a good starting point. I used my spotmeter and took readings from four areas of the image: the sky about 1/2 inch (on this image) above the two towers left of center; one of the darker building on the right (one with few lights); the Bay, about one inch to the right of the bridge; and the road bed of the bridge itself, metering between the cars, avoiding lights. I then averaged the four readings to get the exposure. These are key exposure points for a balance of highlights and shadows. I chose not to meter the trees, since I know they will go dark very quickly and will become silhouetted and never meter lights. Using your eye and watching the lights come on is an important part of the exposure, and keeps you “in the moment” of the image at hand. After all, you are supposed to have chosen the perfect location–enjoy the view!
This exposure is 4 seconds at f16 on 100ISO film, with my 210mm lens (equivalent to about 70mm in 35mm). Time of day is 451pm on December 2nd. All of the film is processed normally. I will keep the f-stop the same for most of the shots to keep things simpler, varying the time.
.
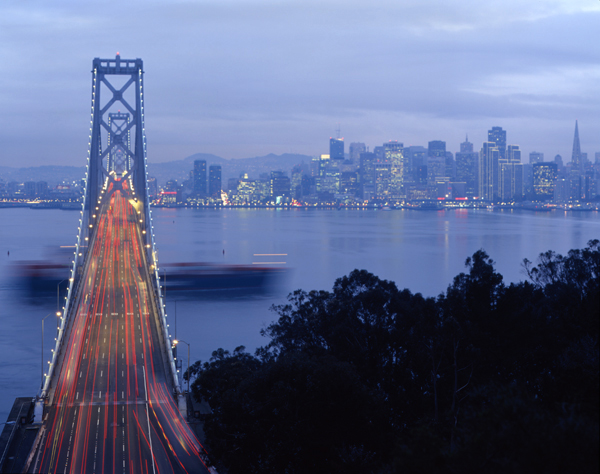 I metered the same way every couple of minutes as the light changed, waiting for a one-stop difference in exposure from the first view. This will give a notably different exposure than the previous shot. I shot a few seconds early for this shot, since a containership was sailing by and thought it would add some interest–and it did! Notice how the light of the bridge and city are becoming more prominent.
The exposure is 8 seconds at f16, one stop darker. Time is 457pm, just 6 minutes after the previous shot.
.
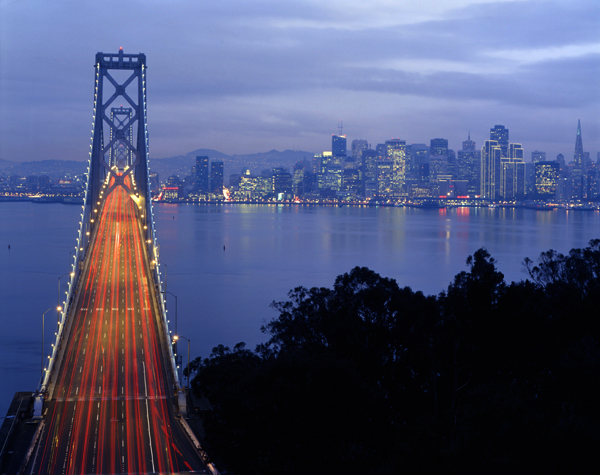 It’s getting later, and the lights are becoming an important part of the image, as we are now into true twilight. This is my favorite time of day, and I think you can see why.
The exposure is 15 seconds at f16, another stop darker. Time is now 505pm, 8 minutes later.
.
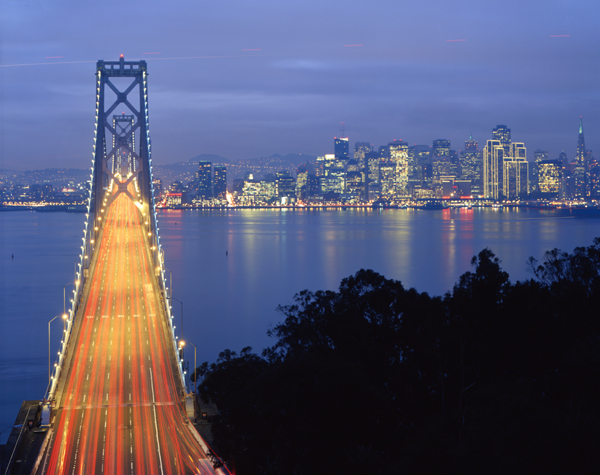 Notice how the sodium vapor lights on the bridge are beginning to dominate, becoming overexposed and overpowering the red taillights of the west-bound cars. The city lights now seems to glow. Note also that the trees are now virtually black. The reflection of the city lights off the Bay really adds to the shot.
The exposure is now 30 seconds at f16, again, a stop darker. Time now is 511pm, 6 minutes later.
.
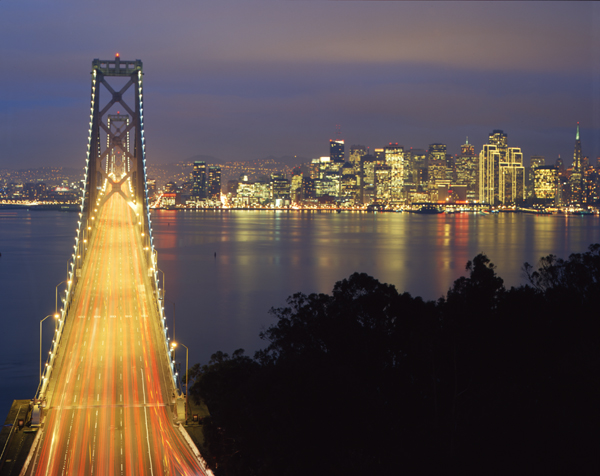
Here is the fifth sheet and the bridge lights have overpowered the taillights and image. Note how the sky is darker and we are able to see the city lights reflected off the clouds. I was going to shoot another sheet with the near black sky, but the rain became too much.
The exposure is now 30 seconds at f11, a stop darker. Note that I opened the aperture a stop so I would not have to do a one minute exposure, subjecting the lens front element to raindrops. The time is now 517pm, 6 minutes later.
On this particular evening, the dense overcast sky prolonged the twilight about twice as long than a clear night because the cloudy sky acts as a soft box and scatters the light. In reality, the “magic hour” was really 15-20 minutes in this case and would have been 10-15 on a clear night.
The reason there is only a 20 minute window is that you have to keep extending the exposure for the ambient sky and subject and the lights, which are a constant brightness, keep getting brighter to the point of over-exposure. What you want is that perfect balance.
Another point is that large format negatives and transparencies also hold the shadows and highlight much better than smaller formats, allowing you to retain more balance the exposure. Also, color negatives will extend the twilight time because of its longer tonal scale. Personally, I like what the transparency gives for twilight and save the negatives for urban night shooting.
As usual, questions or comments are welcome, as I am sure you’ll have some.
It being that time of year, I will take a couple of weeks off from the blog and do another post in early January. Happy holidays to you all!
.
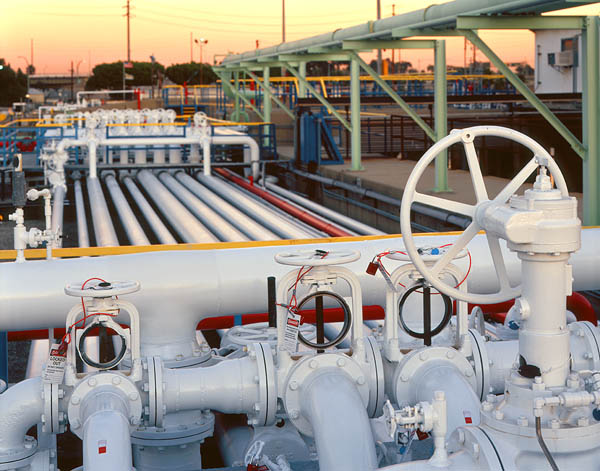 I used select focus on the white freshly painted foreground valves. It might not be as noticeable on a monitor. I shot this because I liked the diagonal lines and the interesting mix of colors of the twilight sky and the green structure and the warm tones of the sky and the cool blue/white of the pipes and valves. The red really popped, as well. At this time of day, the colors are very saturated.
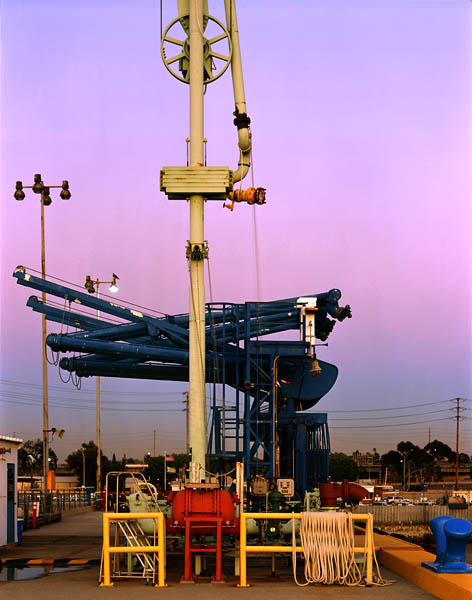 The lights are beginning to come on in this view of the chicksans (the articulating “hoses” that hook the ship to shore). I liked the magenta/blue gradation in the twilight sky. That is a hawk perched on the lit light fixture, left of center. In these two shots, above, the sunset was behind me (looking east).
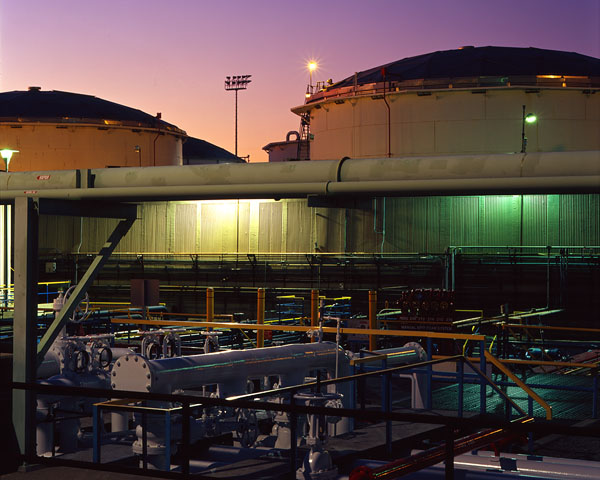 I’ve turned the camera towards the north-west for this shot of the tanks. The camera is positioned to block out the bright lamps and is only 2 foot off the dock. I shot this because of the mix of colored lighting. Considering these pipelines move oil and gasoline, they are remarkably clean, as was the whole facility.
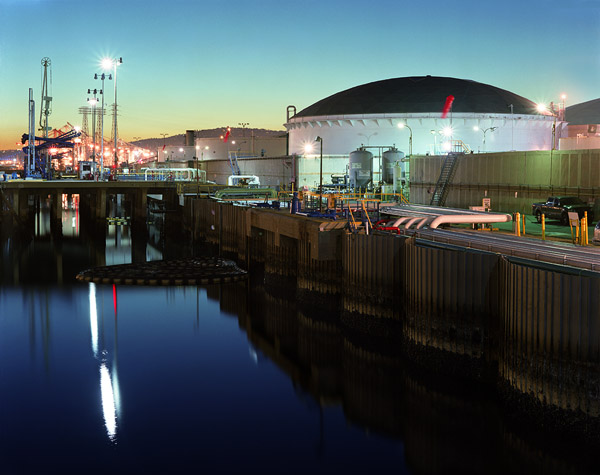 I am now looking west, looking into the twilight sky. The curved bulkheads in the water reflect in the still waters. They mimic the huge round tanks. This is shot on negative film and has a very different feel than the image above, on transparency film.
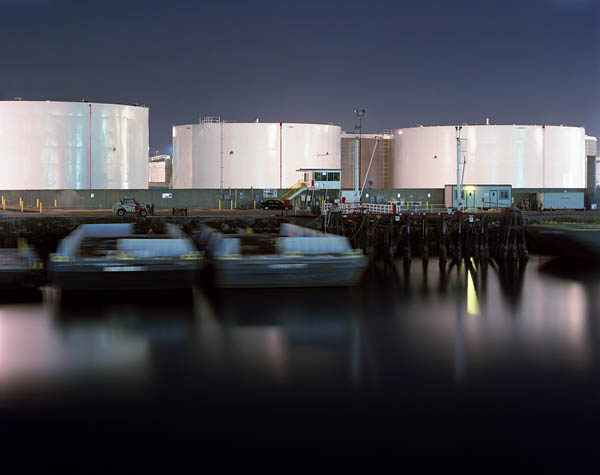 It is now completely dark. This is shot with a longer lens across the slough at a different tank farm. The water was very still and I shot this because of the two barges names are ‘Big Boy’ and ‘Bad Boy’, which made me chuckle. There was more movement in the water than I expected (possibly from the current?) in this 6 minute exposure, as the names are unreadable. The motion of the barges gives a softness to the image, sort of like the roundness of the tanks. The reflections from the white tanks in the water make the shot.
